

Welcome to another brand new issue of Groovy Trendy!
In this issue, I will explain how to do up a simple and easy manicure as well as those that take time, depending on the complexion and the type of nails you have. I would also like to say that this is not a female-specific post. Both the female and male can do manicures, pedicures and makeup.
Step 1:
Use a disinfectant or alcohol spray for both hands. If you don't have the any nail polish on, you can skip part. Otherwise, with a cotton pad or cloth, apply some alcohol or nail polish remover on it to get paint off your nails (if there are any!). This must be done well without leaving any traces of nail polish, so take your own time. (You could always put on some music or watch some videos on your mobile phone or computer so that you won't be quite bored!) It is recommended to do this in descending order (top to the tips of your nail) but remember to do it slowly and with ease.

Step 2:
(This step is only for long and medium nails. If your nails are short, you can skip this!)
Use a nail clipper to cut the long nails. An easy way to do so is to cut them half on one side and half on the other, instead of attempting to cut the whole nail at once.
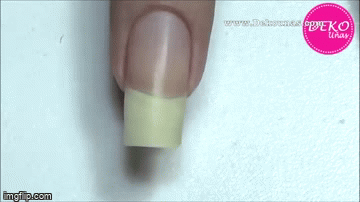
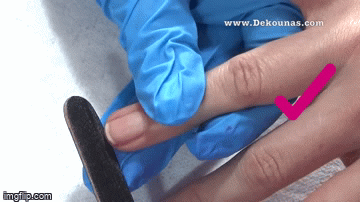
Step 3:
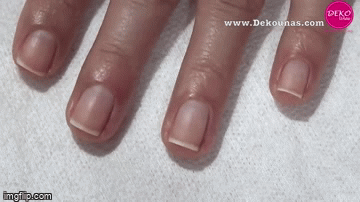
For all nail sizes: Before filing the nails, determine the size of the type of nail that you have. Do not file your nails in a zig zag. That will easily break and peel the nails. Use a nail filer with 150 grit (the simplest and basic for beginners) or superior grit like 180 or 220, or even more. This is depending on your nails. If yours nails are hard, use a superior grit like 220 or 240. On the other hand, if your nails are sensitive or fragile, use a nail filer with 180 or 150 grit. Now, start filing your nails in a parallel or straight form, basically in a single direction, from one side to the other or from top to bottom. Do not file on the edges of the nails and be sure to do only on the nail, not touching the skin. All nails may have a different edge, so do ensure that the nails are of the same edge after filing.
Step 4:
After filing the nails, it's time to take care of the cuticles (which are at the junction between the nail and the finger, that translucent part between the nail and the skin). Put liquid or creamy cuticle remover on the cuticles and let them dry for a while, usually less than 5 mins. At the same time, massage the area and on both sides of the hands so the skin absorbs the liquid or cream.

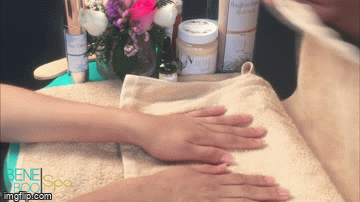
Step 5:
We then put an anti-allergy body scrub or soap on the hands and massage both sides of the hands in a circular way. Once you're done, wrap your hands with a towel and let them rest for a minute before rinsing them in a small bowl with warm or room temperate water. Then, dry your hands really well.
Step 6:
Using a metal cuticle pusher or an orangewood stick (if you use an orangewood stick, make sure to immediately throw it away after using it because it is unsanitary to reuse it again), slowly push the curticles in a circular motion from the sides to the center. Do not do it forcefully or it will break the nail.
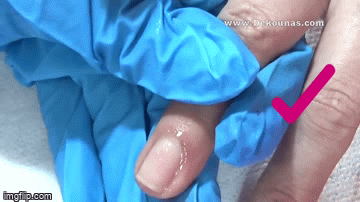
Step 7:
When the cuticle pusher is used, we are eliminating dead cells that are stuck to the nail plate, which will allow the nail to look cleaner and grow well. Hence, use the other side of the cuticle pusher to remove the dead cells. Do remember to go under the edge of your nails and remove the dirt that might be stuck there.
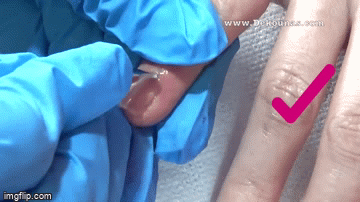
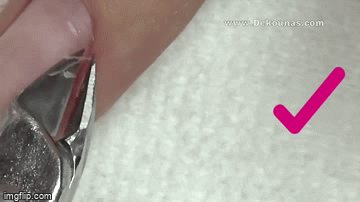
Step 8:
Next step is to cut the remaining excess skin near your cuticles with a nail clipper, although this step isn't recommended. Do this gently, and avoid cut the skin excessively and it might injure your skin. Definitely do not pull on them. Make small cuts. It isn't necessary to cut the entire area.
Step 9:
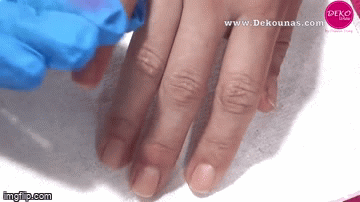
Next, use an anti-allergic exfoliant on the hands and fingers, massaging them for at least 5 minutes for each hand. Wash them with cold water and soap, and dry your hands afterwards.
Step 10:
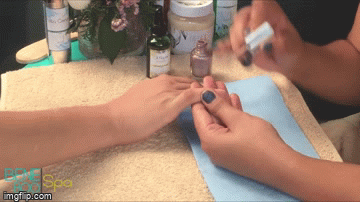
Use the disinfectant or alcohol spray again but this time on the nail buffer. Then, use the buffer and gently run it over each nails. The buffer is used to smooth the nail plate or polish the nail plate, unify stretch marks and imperfections to remove nail grease. After using the buffer, we apply disinfectant or alcohol spray on the nails and using a cloth or cotton pad, dry the nail and remove dust and grease, in ascending motion (bottom to top).
Step 11:
Now we first use a nail polish base to strengthen the nail. The procedure is from top to bottom. To facilitate nail polishing, use a thin brush. Then, wait for it to dry before applying the nail polish.

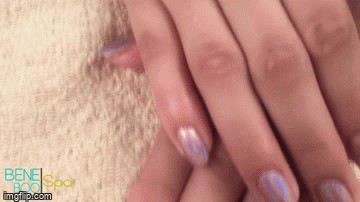
Step 12:
It's time to apply the nail polish. You have to apply three layers of the polish to the nail. Start on the right side of the nail, then the left and finally at the center of the nail. Once it's dried, it's time to go to the final step!
Step 13:
Moisturize the cuticles with cuticle oil and apply it around the curticle. This helps to hydrate after all these steps and prevent any dust from sticking to the newly polished nail. After applying that, perform a gentle massage on the nail and cuticule, making sure that the skin absorbs all that oil.

The final product should look like this! Tada~

created and coded by Judith Albarn